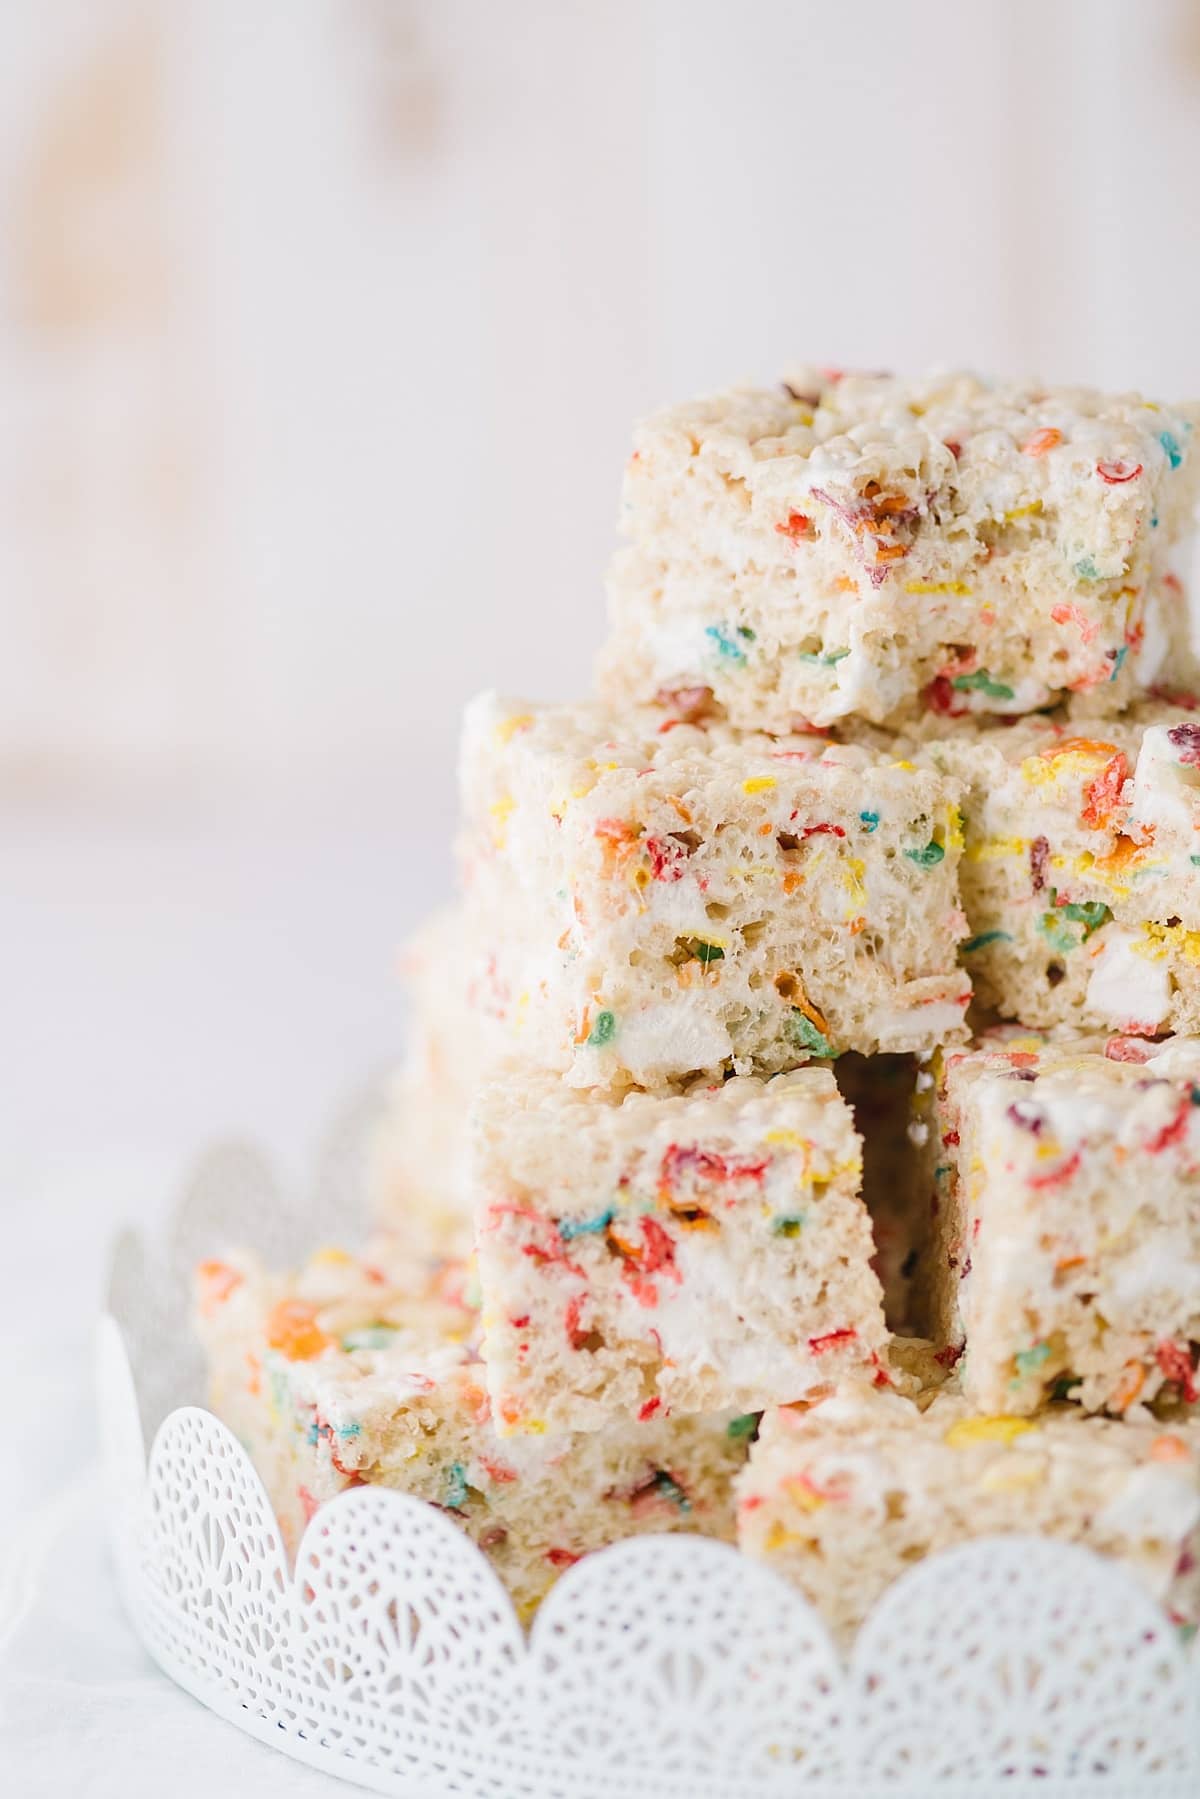
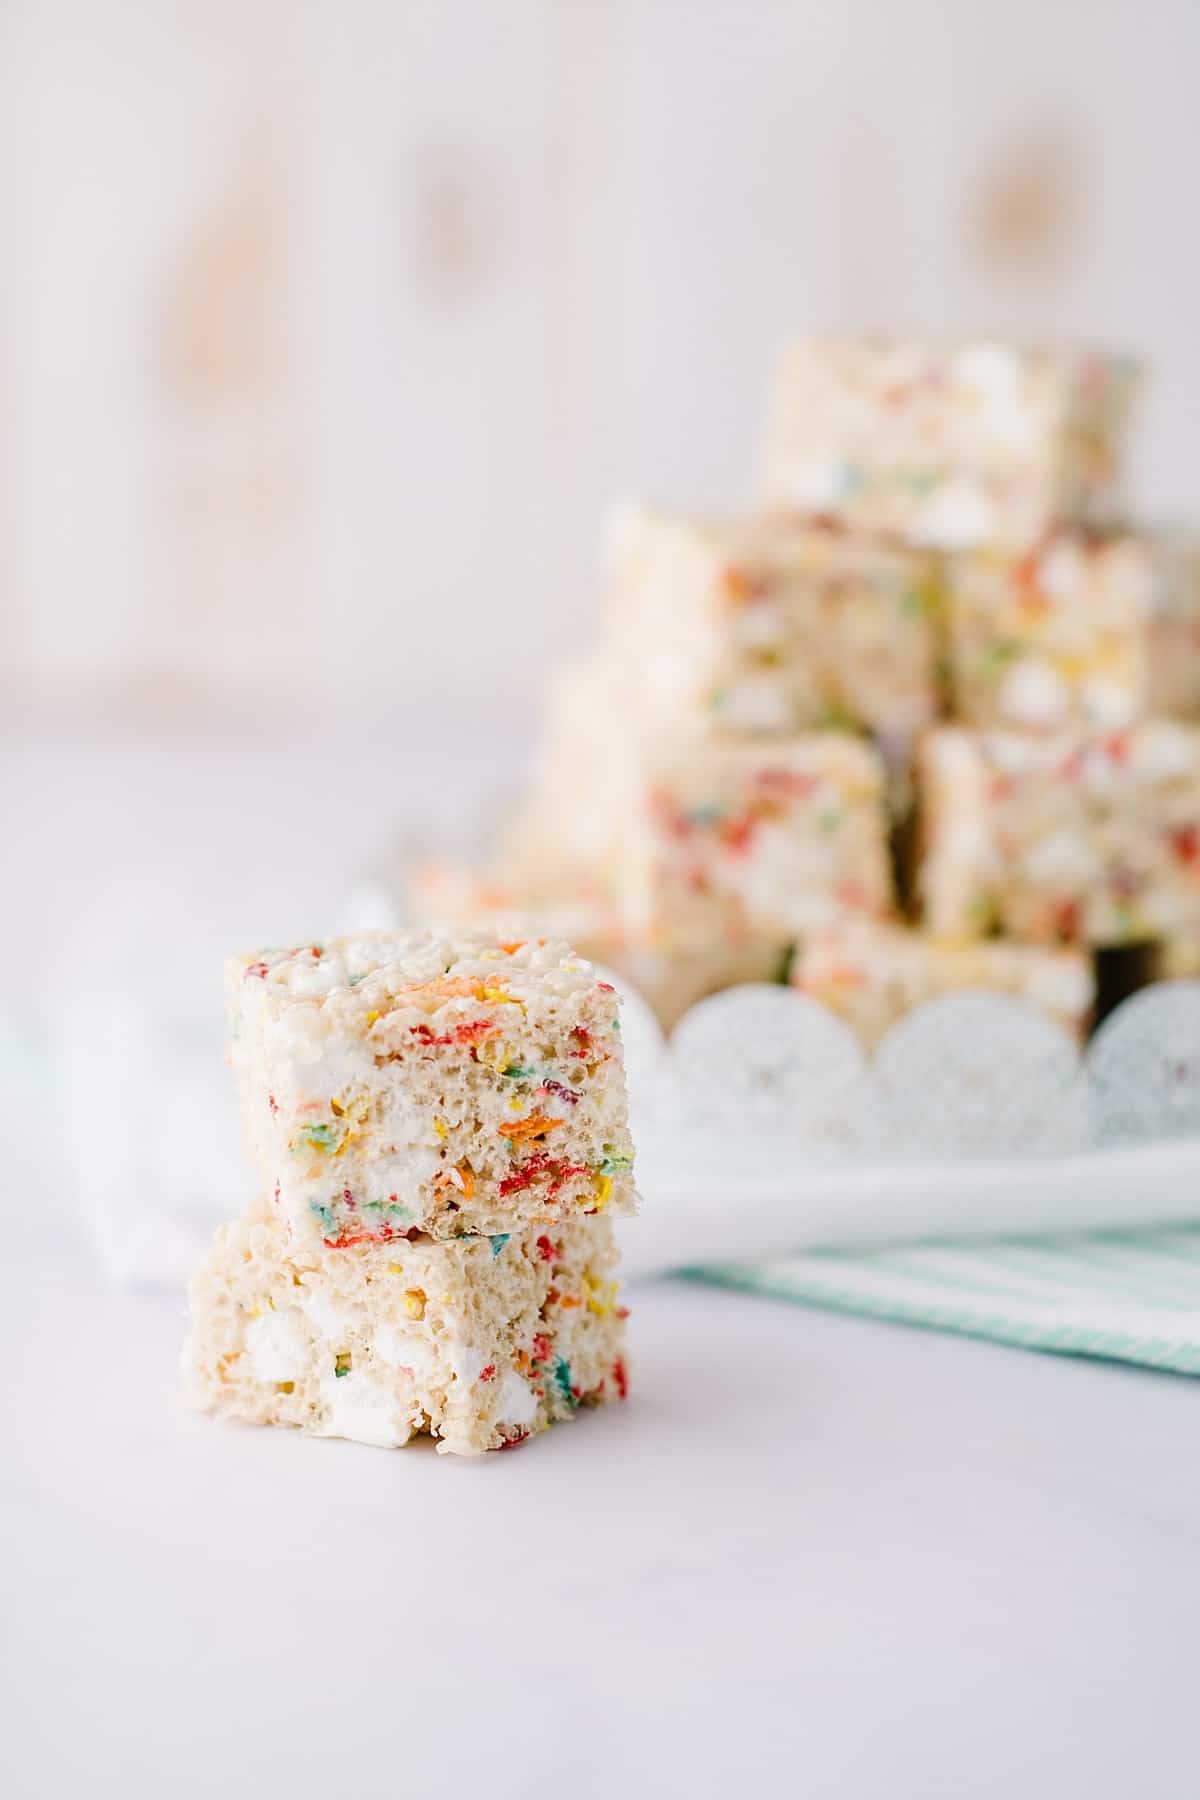
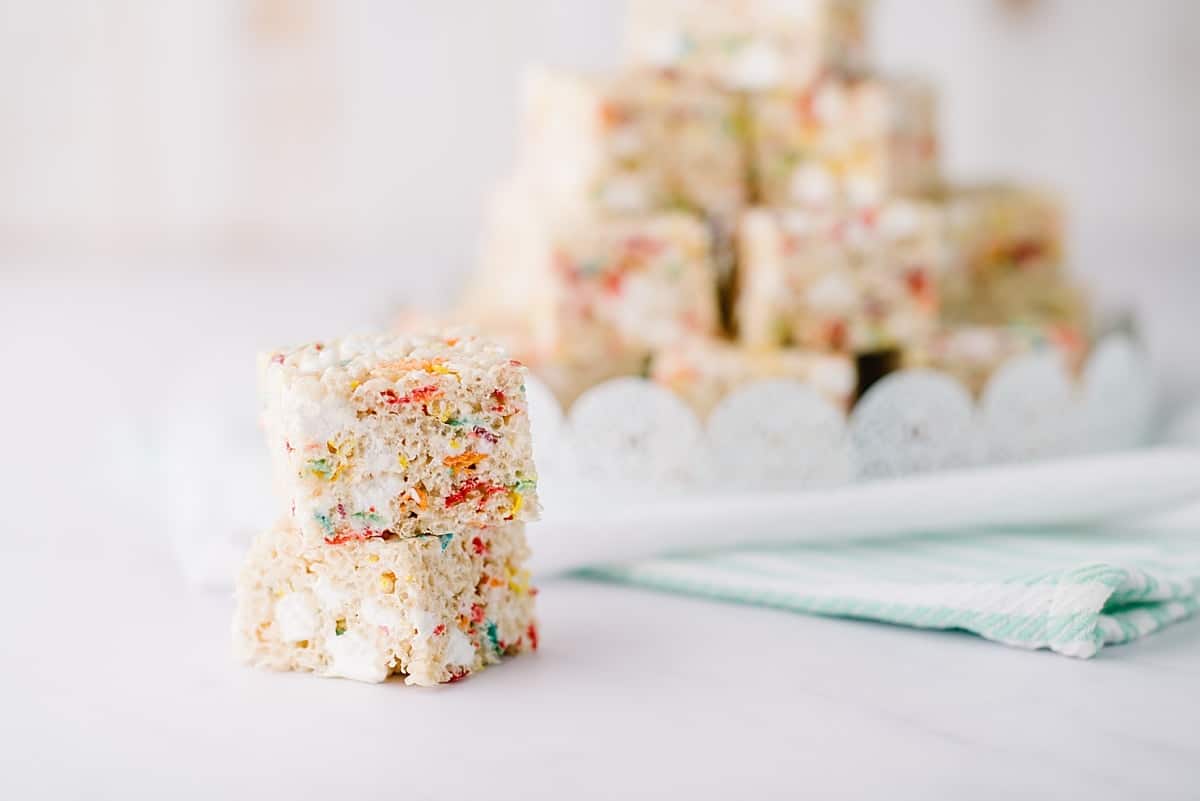
Rainbow Rice Krispie Treats with Fruity Pebbles and marshmallows are the best no-bake dessert for birthdays, Easter, St. Patrick’s Day and so much more. Soft, sweet, gooey, and absolutely delicious.

Rainbow Rice Krispie treats are the perfect combination of Rice Krispies, Fruity Pebbles, and marshmallows. Ava and I played with the ratios until we ended up with the perfect balance of cereals to marshmallow in these irresistible sweet treats -all for a great cause.
Doctors and researchers are making progress yet only 4% of the money raised for cancer research goes to pediatrics. My food blogger friends and I develop recipes to raise awareness and money for the fight against pediatric cancer. We raise thousands each year and some amazing and generous brands have partnered with us to match our donations.
These fun rice Krispie treats were my contribution to an amazing cause. I’ve played with the ratios of cereal to marshmallows many times and these are definitely the best. Each square is sweet, thick, and super marshmallowy.

Ingredients //
- Butter: helps achieve a soft, pleasant texture as well as prevents the squares from sticking to the pan. Since there is salt in this recipe, use unsalted butter.
- Mini Marshmallows: You’ll need about 3 bags -the fresher the better.
- Rice Krispies: or a comparable off-brand. No one will ever know the difference.
- Fruity Pebbles: not only add color, but also some subtle citrus flavor.
- Kosher Salt: Don’t skip the salt. I know it seems counterintuitive to add salt to sweet, but it enhances the flavor and keeps the treats from being too sweet (because yes, that is possible).
- Vanilla: enhances the sweet and sugary flavors making Rice Krispies treats everyone’s favorite snack.
- Recommended Equipment: For this recipe, a 9″ x 13″ baking pan, parchment paper, cooking spray, large Dutch oven or pot, heavy spoon, and an offset spatula are recommended for success.
How to Make // The Steps
How To Make Rice Krispie Treats with Fruity Pebbles

Step 1: Prep baking pan:
Line a 9″ x 13″ baking pan with parchment paper and then spray the parchment paper with cooking spray. Set aside.
Step 2: Melt butter and marshmallows:
In a large Dutch oven or pot, add butter and melt over low heat. Next, add two bags of marshmallows, stirring continuously until smooth and melted. As soon as the marshmallows are melted, remove the pot from the heat and then stir in the salt and vanilla.
Step 3: Mix with cereals and remaining marshmallows:
To the melted marshmallow mixture, add the Rice Krispies, Fruity Pebbles, and the last bag of marshmallows. With a sturdy spoon, stir until the cereal is evenly dispersed throughout the marshmallow.
Step 4: Press mixture into the pan to set:
Transfer the mixture to the prepared pan. Coat an offset spatula with cooking spray and use it to gently spread the mixture in the pan in an even layer. Allow the mixture to cool completely and set in the pan (about one hour) before slicing into squares.

Tips & Tricks //
- I like adding the third bag of marshmallows in with the cereal once the pot is off the heat. The residual heat melts them just enough to be sticky yet still hold some shape.
- If you do not have an offset spatula, you can use your clean hands to press the mixture into the pan. Spray your hands with a bit of cooking spray to keep the mixture from sticking.
- Don’t pack the mixture too tightly. If it is too compressed your bars might become hard as a rock.
- To cut clean squares. make sure the pan of Rice Krispies treats has cooled completely.

Why are Rainbow Rice Krispie Treats So Good?
- These are the perfect Rice Krispie treats with Fruity Pebbles. -soft, sweet and delicious.
- No-bake! It doesn’t get much easier than this minimal effort recipe.
- These fun squares are perfect for every holiday and celebration.
- You can customize these treats with different cereals and mix-ins.
Holiday Variations //
As is, these fruity pebble Rice Krispie treats are fun, festive, and perfect for any holiday. To really get into the holiday spirit, check out these adorable variations:
- Valentine’s Day: press candy hearts on the surface of each square before the mixture sets completely.
- St. Patrick’s Day: add Lucky Charms cereal marshmallows in with the Fruity Pebbles and Rice Krispies.
- Easter: decorate each square with Cadbury mini-eggs before they set.

How to Store //
Storing: Rice Krispies treats have the best flavor and texture the same day they were prepared (unless you freeze them asap). However, they can be stored at room temperature in an airtight container for up to 3 days.
Make-Ahead and Freezer Options //
Freezing: After the treats have cooled, set and you’ve sliced them into squares, wrap each square in wax paper and store in a freezer-safe bag or container for up to 3 months.
FAQ
Yes. To dye the melted marshmallow mixture, simply fold in 1 to 2 drops of food coloring at a time until the desired color is reached.
To achieve the perfect texture, be sure you’re using fresh marshmallows melted over low heat, and do not pack the mixture in the pan too tightly.
Yes, but the colors will bleed together once melted, so I recommend replacing the third bag of marshmallows with a bag of mini-pastel marshmallows and adding them in with the cereals. They are supposed to be fruit-flavored so the taste will be a bit different.
More No Bake Recipes //
No-Bake White Chocolate Cheesecake with Mulled Wine Fruit
Snowman Marshmallow Hot Chocolate Toppers

Rainbow Rice Krispie Treats
Rainbow Rice Krispie Treats // The perfect combination of Rice Krispies, Fruity Pebbles, and marshmallow. Everyone is powerless over these.
Ingredients
- 1/2 cup butter
- 3 (10 oz.) bags mini marshmallows
- 10 cups Rice Krispies
- 2 cups Fruity Pebbles
- 1/2 teaspoon kosher salt
- 2 teaspoons vanilla
Instructions
Line a 9x13 pan with parchment paper and spray with cooking spray. Set aside.
Melt butter in a large Dutch oven or pot. Add two bags of marshmallows and stir until completely melted. Remove from heat and add salt and vanilla.
Add Rice Krispies, Fruity Pebbles, and the additional bag of marshmallows to melted marshmallow. Stir to coat completely.
Turn out into prepared pan. Spray an offset spatula with cooking spray and press into pan. Let set in pan for one hour before cutting into bars.
Did you make this recipe?
Please leave a comment on the blog or share a photo on Pinterest
This Post Has 42 Comments
Pingback: Honey Pistachio Shortbread - stetted
Pingback: Pineapple Coconut Bar Cookies - Barbara Bakes™
Pingback: Red Velvet Mini Layer Cakes - Swirls of Flavor
Pingback: Raspberry and Rose Meringue Parfaits and the 2019 Good Cookie Food Bloggers Valentine's Event | Cup of Zest
Pingback: Chocolate madeleines - Caroline's Cooking
Pingback: Chocolate Raspberry Roll-Ups - It's Okay To Eat The Cupcake
Pingback: Raspberry Linzer Cookies | Stephie Cooks
Pingback: Brown Butter Chocolate Chip Cookies - Kara In the Kitchen
Pingback: Dark Chocolate & Bourbon Coconut Cream Mousse - Taste Cook Sip
Pingback: Heart-Shaped Chocolate Chip Cookie Cake - The Little Kitchen
Pingback: Valentine Heart Gummy Recipe - April Golightly
Pingback: Chocolate Vanilla Striped Shortbread Cookies - Chez Us
Pingback: Hazelnut Shortbread Cookies with Jam | Garlic & Zest
Pingback: Cherry Cordial Bundt Cake - Apron Warrior
Pingback: Brown Butter Bourbon Chocolate Chip Cookies | Haute Pepper Bites
Pingback: OH-So Easy Chocolate Chip Cookie Pie - Okay Optimism
Pingback: Lemon Poppy Seed Cookies | Two Places at Once
Pingback: Chocolate Raspberry Cupcakes • The Crumby Kitchen
Pingback: Small Batch Bakery Style Chocolate Chip Cookies Recipe
Pingback: Valentine's Day Gluten Free Sugar Cookies -
Bree, Thank you for a beautiful recipe for such a worthy cause!
Your Mediavine swag is on the way and should be to you soon. It’s just a small token of our appreciation for your time and efforts to wipe out pediatric cancer.
— Susannah at Mediavine
Thank you for generously matching our donations, we appreciate it so much!
Pingback: Chocolate Peanut Butter Valentine’s Cookies – The Salted Cookie
Pingback: Chocolate Chip Pudding Cookies | Jonesin' For Taste
Pingback: Cardamom Rose Sugar Cookies - Confectionary Tales of a Bakeaholic
Pingback: Sprinkled Chocolate Shortbread Heart Cookies
Pingback: Maple Butter Chocolate Chip Cookies - Southern Revivals
Pingback: Shortbread Cookie Recipe -
Pingback: Brown Butter Chocolate Chip Cookies - Kara J Miller
I was looking for this recipe for the whole family and I stumbled on this article. I read and followed the instructions carefully and I made it deliciously! Every member of my family is so happy! Thanks for this, we shared it on our blog http://com-me.com
I am so glad that you liked them so much.
Do you know how many cups are in one 10 oz bag? They’re not sold in ounces where I live. Thanks!
Approximately 6 cups.
Pingback: Small Batch Bakery Style Chocolate Chip Cookies Recipe
Pingback: Raspberry and Rose Meringue Parfaits | Cup of Zest
Pingback: Red Velvet Mini Cake Recipe - Swirls of Flavor
Pingback: Chocolate Vanilla Striped Shortbread Cookies | Chez Us
Pingback: Chocolate Dipped Cashew Butter Cookies • Fit Mitten Kitchen
Pingback: The Best Potato Chip Cookies Recipe for Your Sweet and Salty Cravings
Pingback: Hazelnut Shortbread Cookies with Jam | Garlic & Zest
Pingback: 25 Rainbow Desserts That Are Colorful and Fun - Insanely Good
Pingback: Sprinkled Chocolate Shortbread Heart Cookies