Savor the tender juiciness and deep flavors of ribs cooked low and slow with this easy recipe that brings in smoky notes from a spice rub!

Die-hard grillers will tell you there’s only one way to cook ribs. But I disagree! Sure, that smokiness from the grill is a nice touch, but the main goal is tender, juicy meat that literally falls off the bone. For that, you have two choices: cook the ribs in your kitchen before tossing them on the grill for a final char—or cook them low and slow in a Dutch oven.
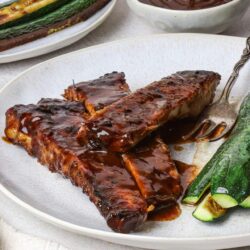
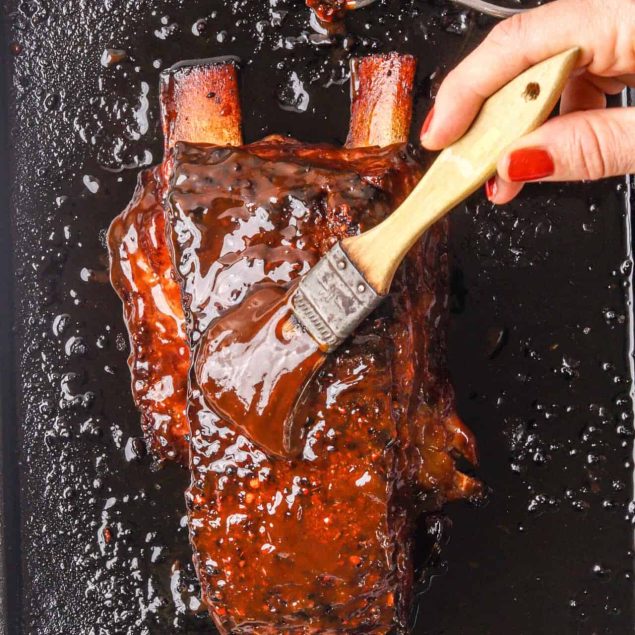
I prefer the simplicity of a single cooking method, which is how this Dutch oven ribs recipe came about. It delivers the fall-off-the-bone tenderness your family craves plus a hint of smoky flavors from a clever spice rub mixture. And it does all that in only one pot! However, I will admit that I sometimes add one more step to this recipe for a caramelized finish. If you transfer your cooked ribs to a foil-lined baking sheet, brush them with more sauce, then broil them for about five minutes, they’ll get slightly charred, sticky, and mind-blowingly delicious!
Use this recipe for pork or beef ribs, depending on your family’s preferences. Pork ribs tend to be smaller, leaner, and milder in flavor. They also absorb seasonings really well and cook more quickly. Beef ribs, on the other hand, are larger and meatier with a bolder flavor profile. The choice may come down to which one fits better into your budget—and your Dutch oven!
What exactly is a Dutch oven?
A Dutch oven isn’t an oven at all! It’s a heavy-duty cooking pot made most commonly from cast iron, often coated in enamel for easy cleaning and added durability. Its thick walls and tight-fitting lid help it retain and evenly distribute heat, making it ideal for slow-cooking dishes like this one. With its wide base, sturdy handles, and versatile design, a Dutch oven can do a lot in the kitchen. It moves easily from stovetop to the oven, so you can use it to simmer stews, braise meats, bake bread, and even deep-fry or roast! The shape and weight of the pot allow ingredients to cook evenly, while the lid traps moisture, creating a self-basting environment that enhances flavors and tenderness.
The origins of the Dutch oven trace back to the Netherlands in the 17th century. Dutch craftspeople perfected a sand-casting process for pots made of brass and, later, cast iron. When an Englishman named Abraham Darby visited Holland, he brought the technique home and started producing similar cast iron pots in England—which led to the name “Dutch oven.” Over the centuries, these pots gained global popularity due to their exceptional durability and versatility.
How do I store leftovers?
Let your ribs cool before storing, but don’t leave them at room temp for more than 2 hours. Store leftovers in an airtight container or resealable bag in the fridge for up to 3 days. You can also freeze these ribs for up to 3 months in a freezer-safe container or bag. Thaw overnight in the fridge. Reheat in a 325°F oven, wrapped in foil, for 15–20 minutes or until warmed through to an internal temp of 165°F.
Serving Suggestions
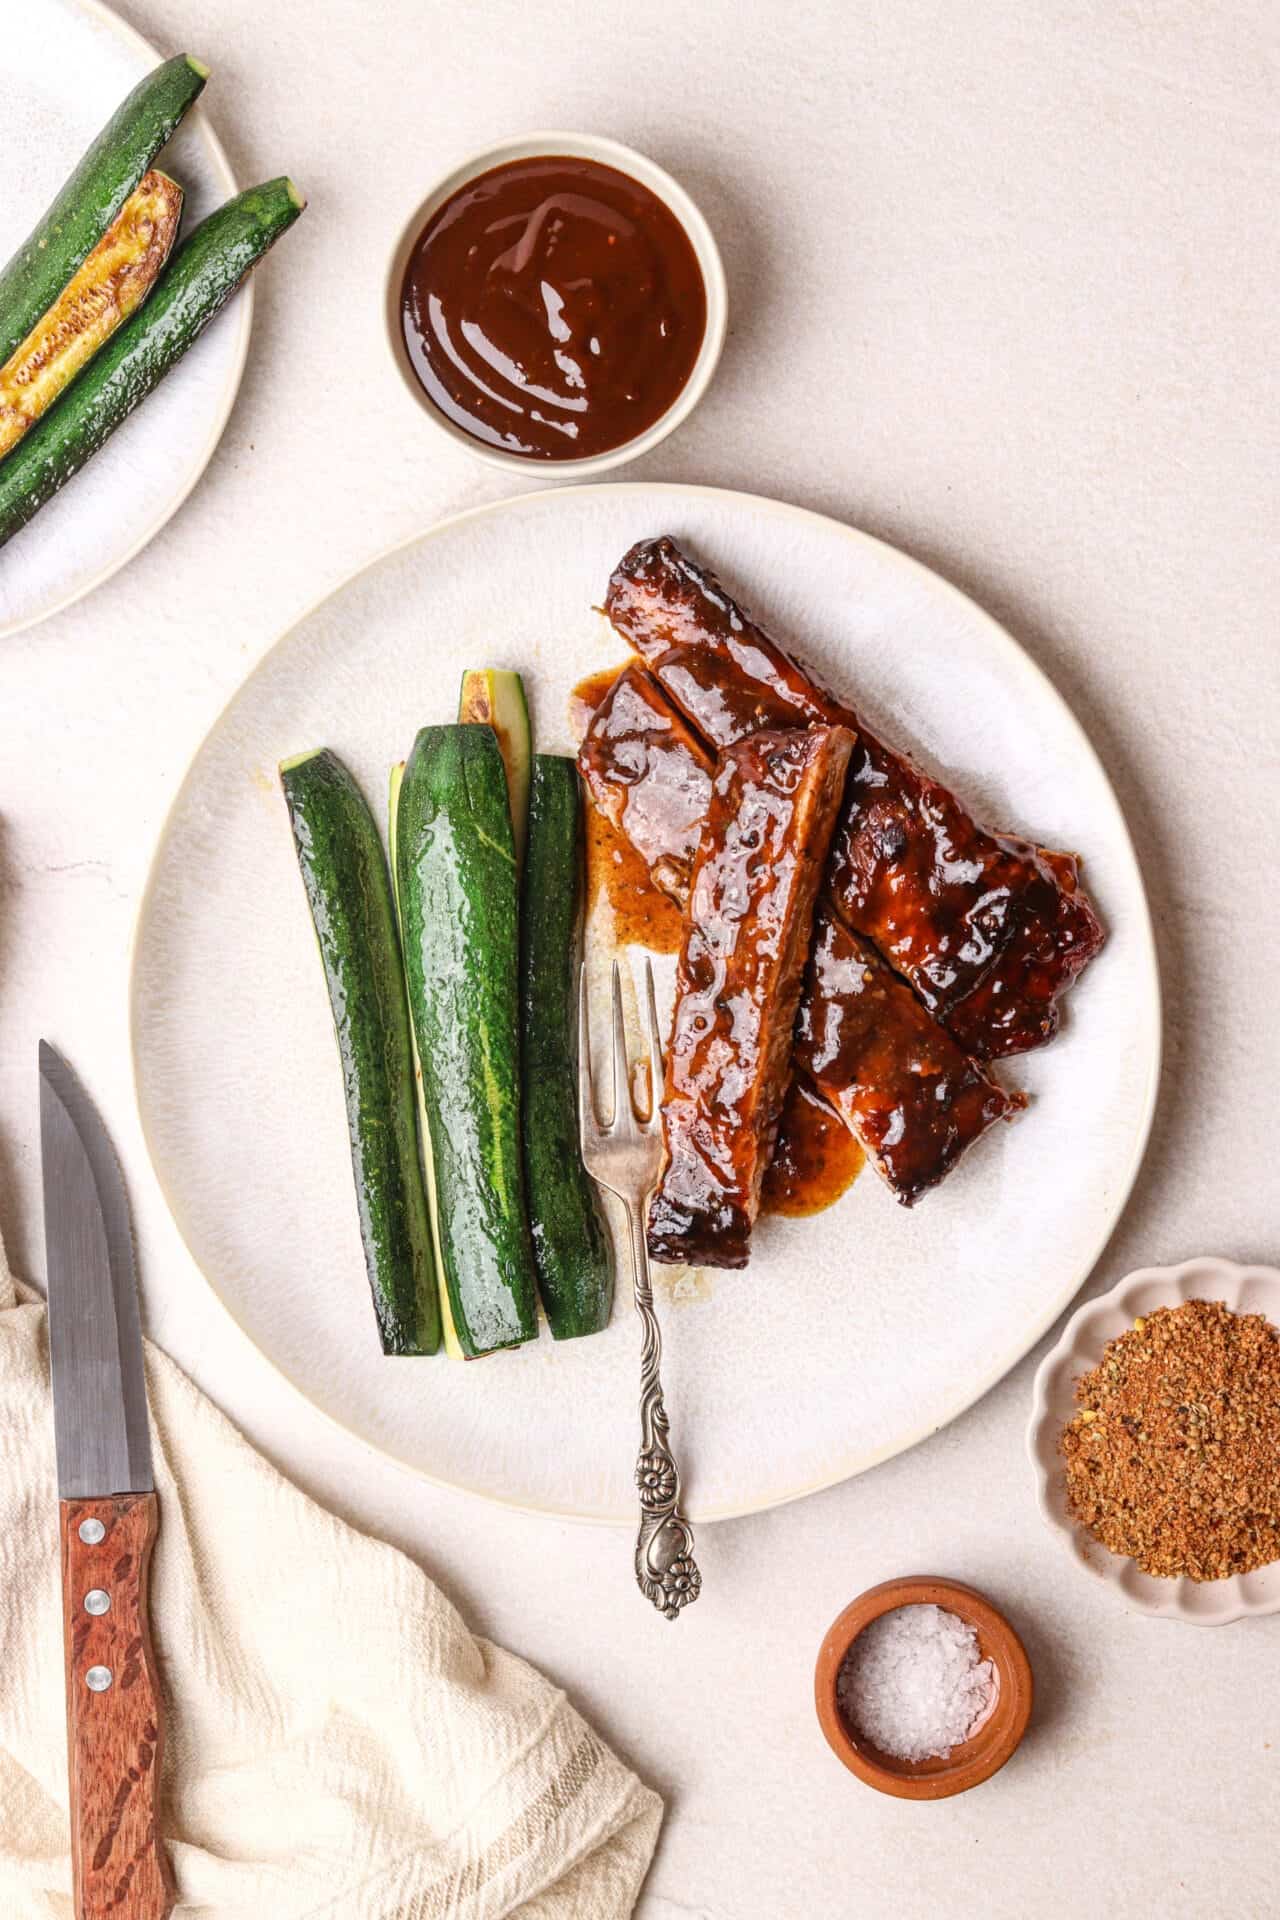
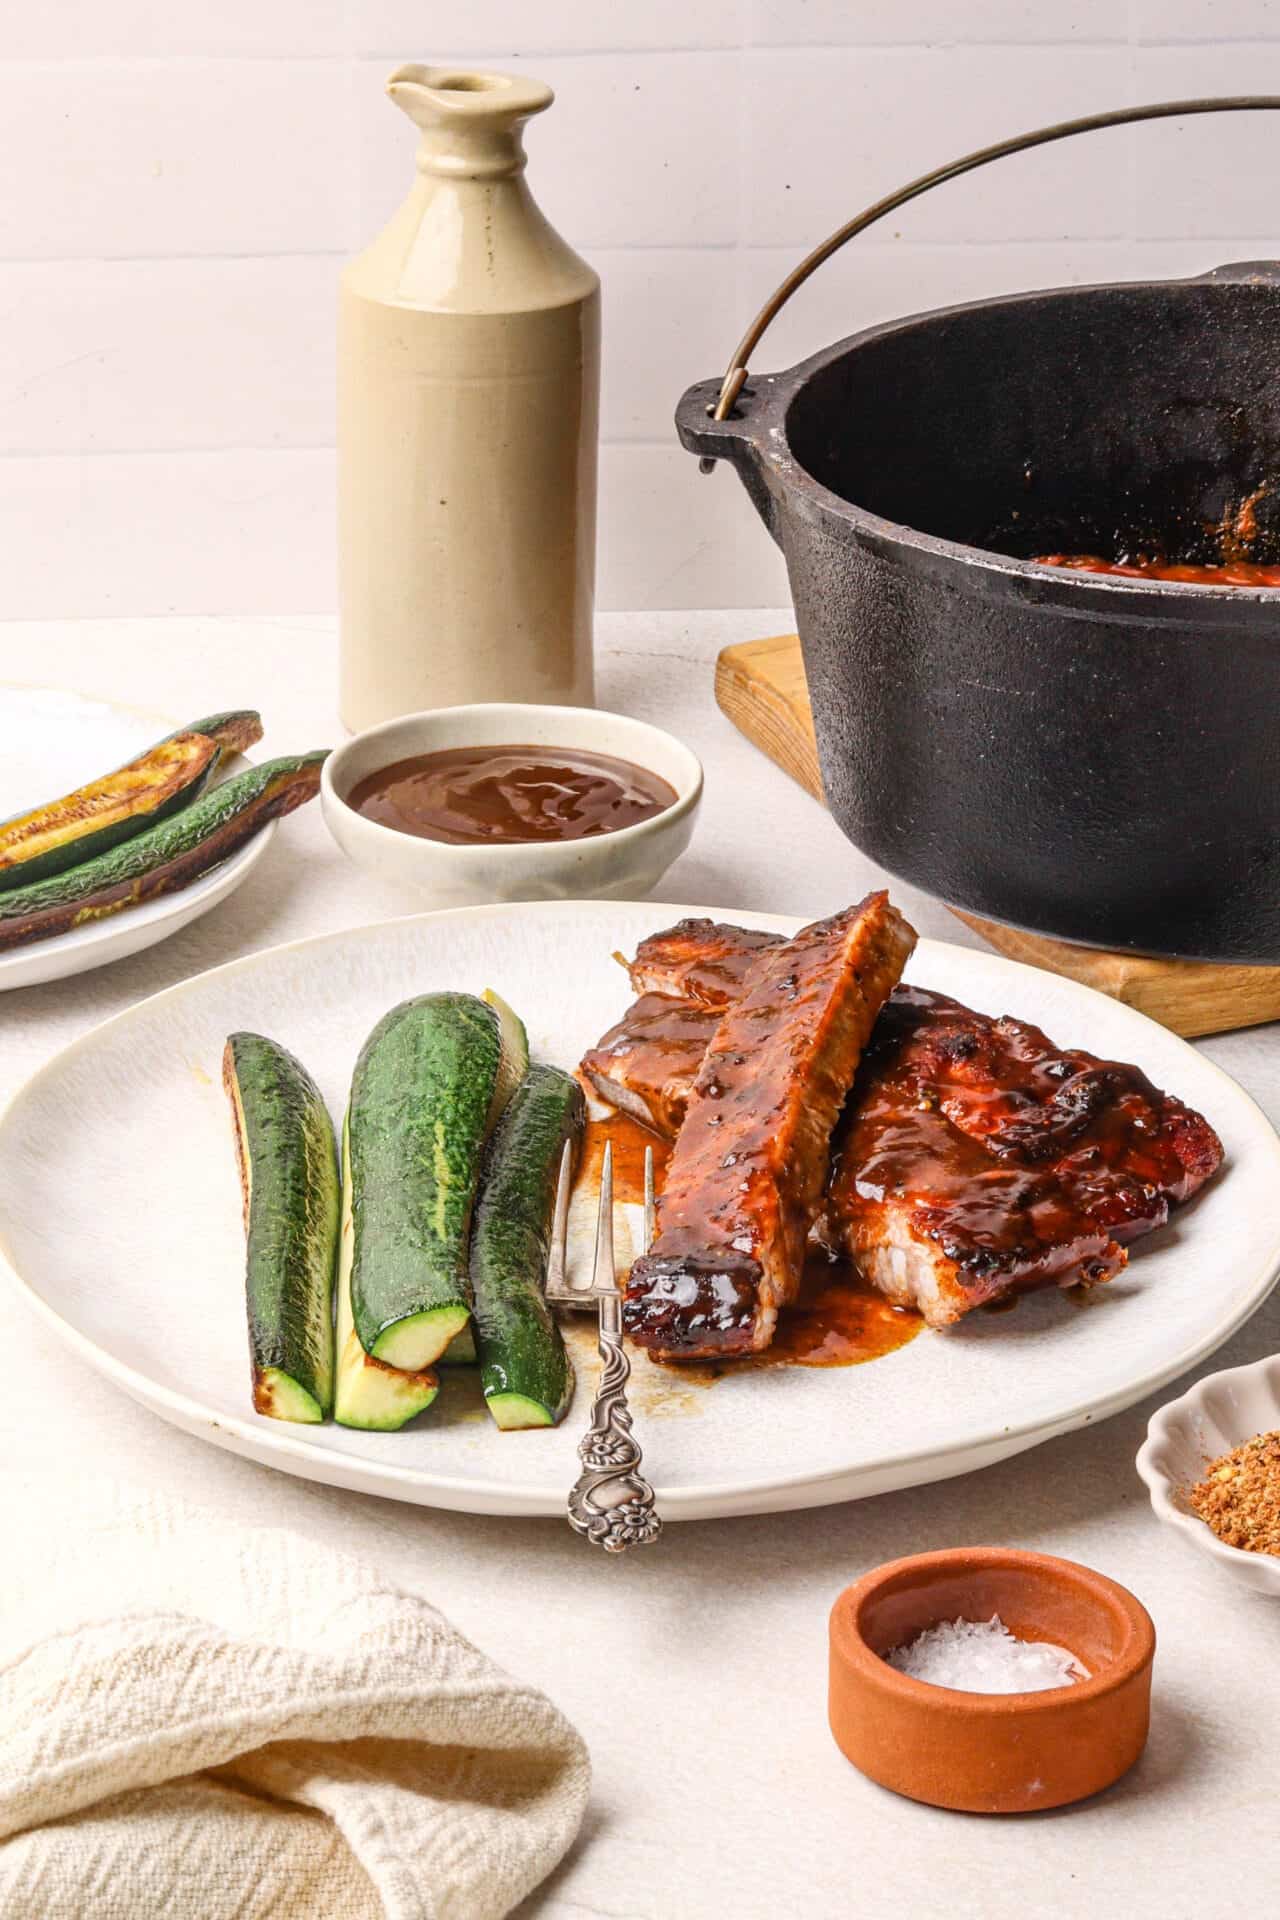
I serve these Dutch oven ribs alongside dishes that balance their rich, savory flavors. Summer-inspired sides like this Southern Potato Salad Recipe and Jamaican Coleslaw make excellent pairings. A kid-friendly spread could include Creamy Baked Mac And Cheese and Air-Fryer Green Beans.
Dutch Oven Ribs Recipe
Ingredients
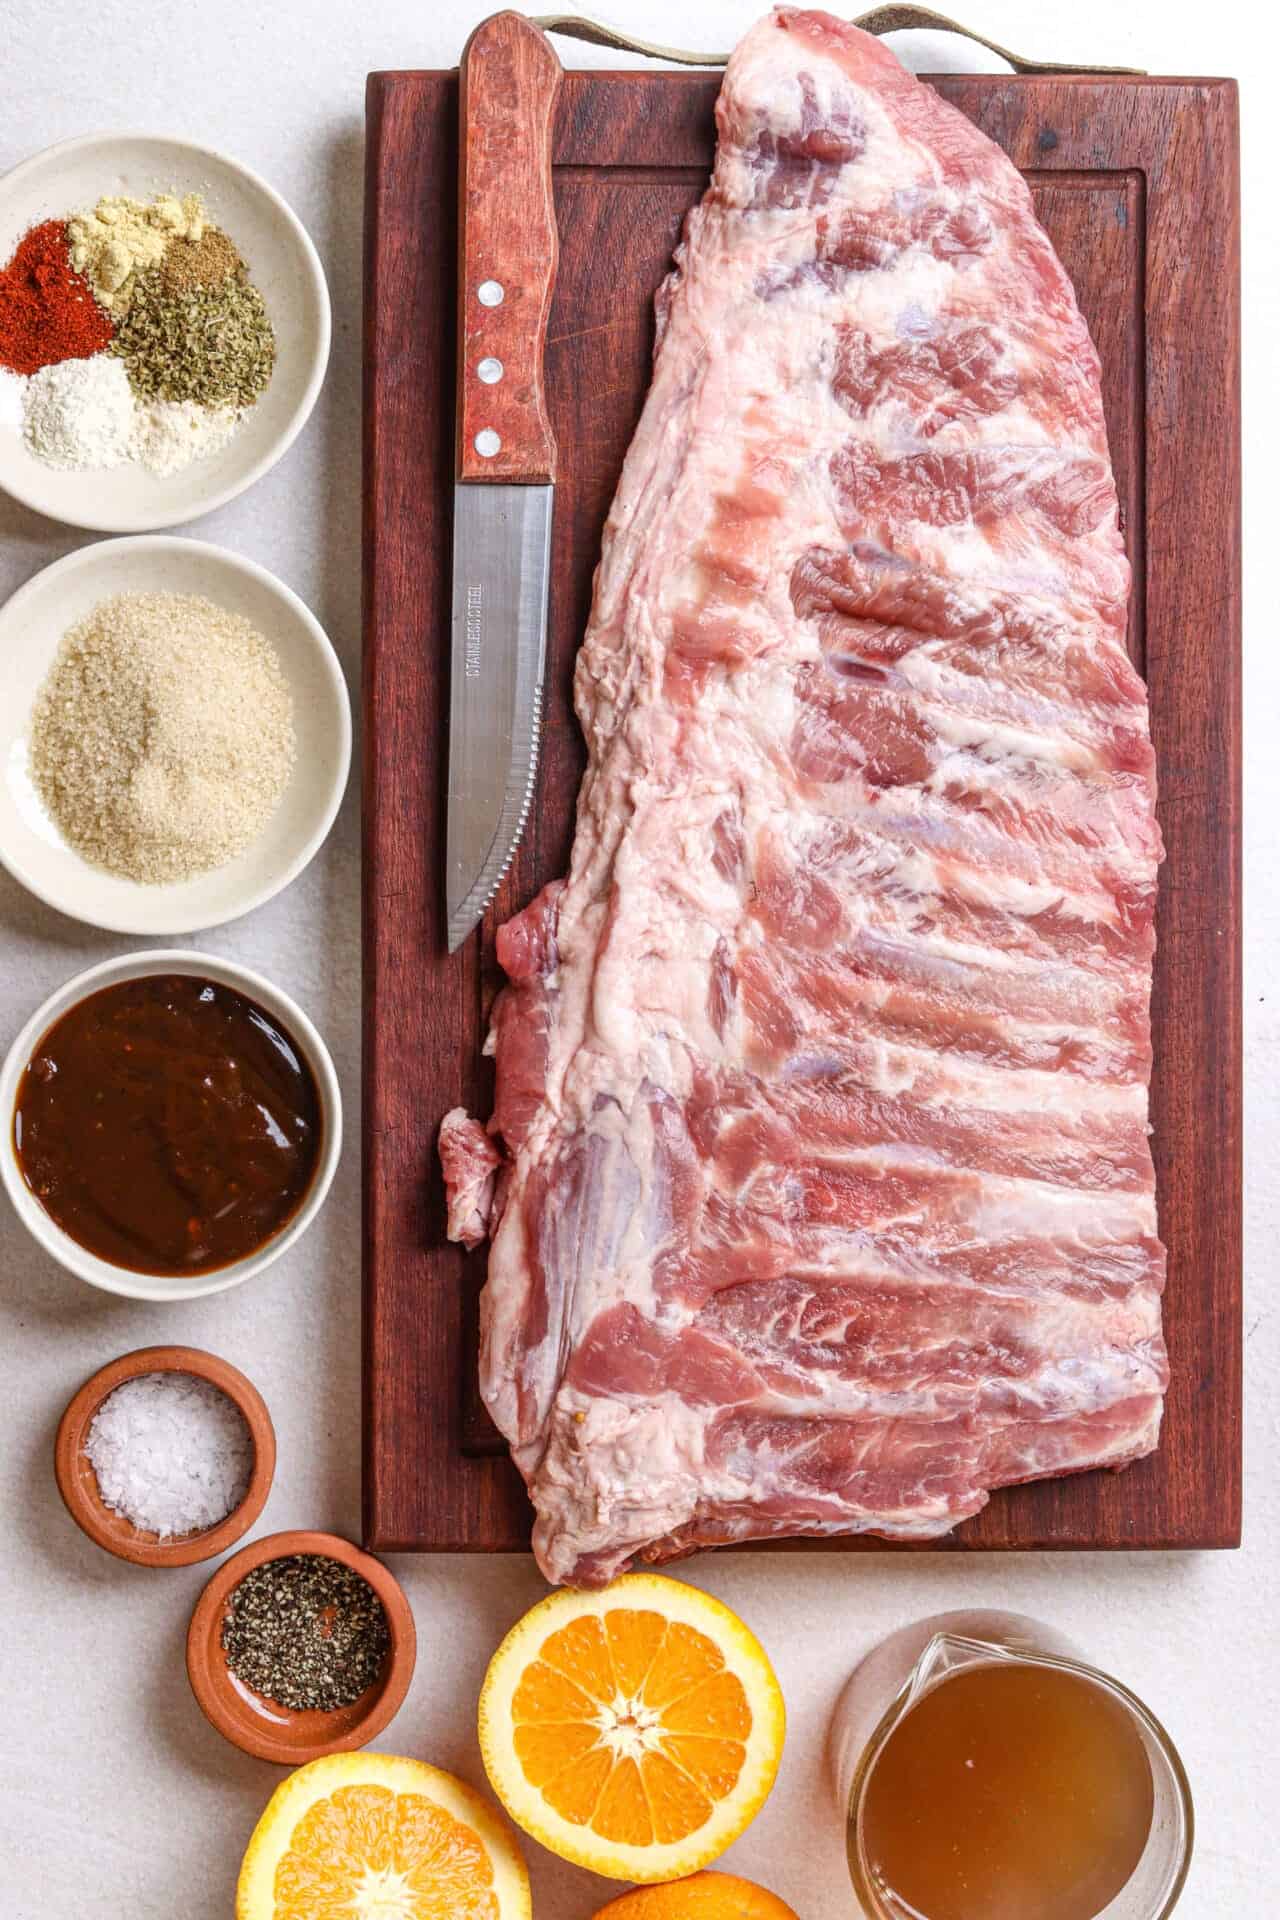
- 1 rack of ribs beef or pork, about 2 pounds
- 3 tablespoons brown sugar
- 1 teaspoon smoked paprika
- 1 teaspoon onion powder
- 1 teaspoon dried oregano
- 1/2 teaspoon garlic powder
- 1/2 teaspoon mustard powder
- 1/2 teaspoon ground coriander
- 1/4 teaspoon salt
- 1/2 teaspoon black pepper
- 1/2 cup barbecue sauce
- 1 cup beef stock
- 1/2 orange optional
Instructions
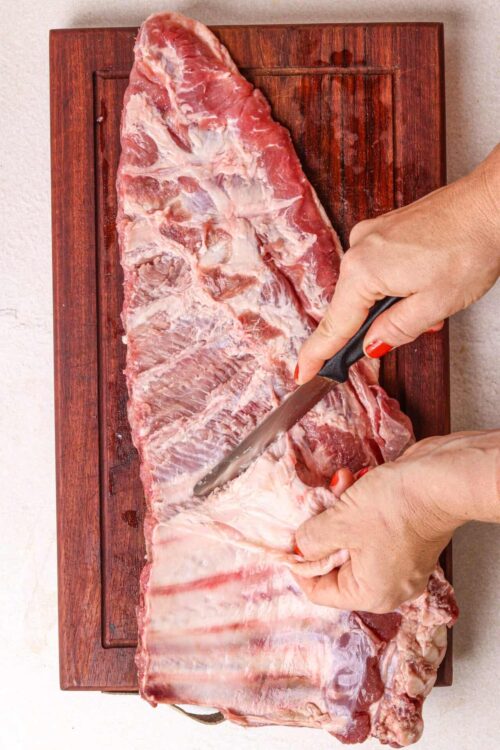
- Preheat the oven to 275ºF. Use a sharp knife to slide under the thin membrane on the underside of the ribs and peel it off. Cut the rack into sections that will fit comfortably in your Dutch oven.
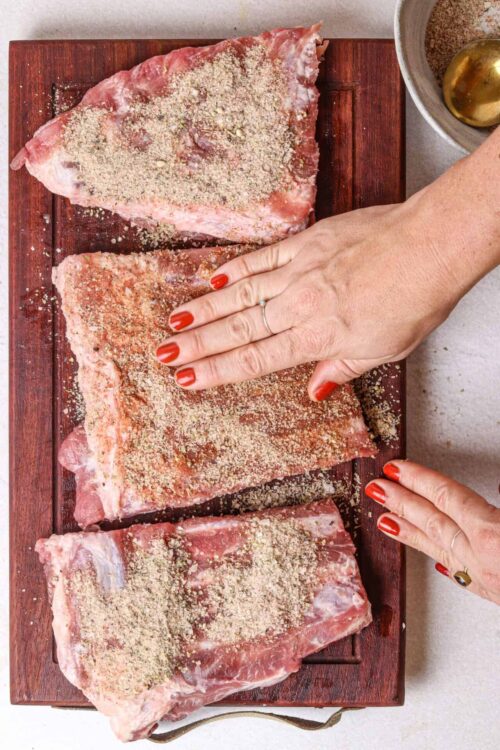
- In a small bowl, combine the brown sugar, smoked paprika, onion powder, oregano, garlic powder, mustard powder, coriander, salt, and black pepper. Rub half of the spice mixture all over the ribs.
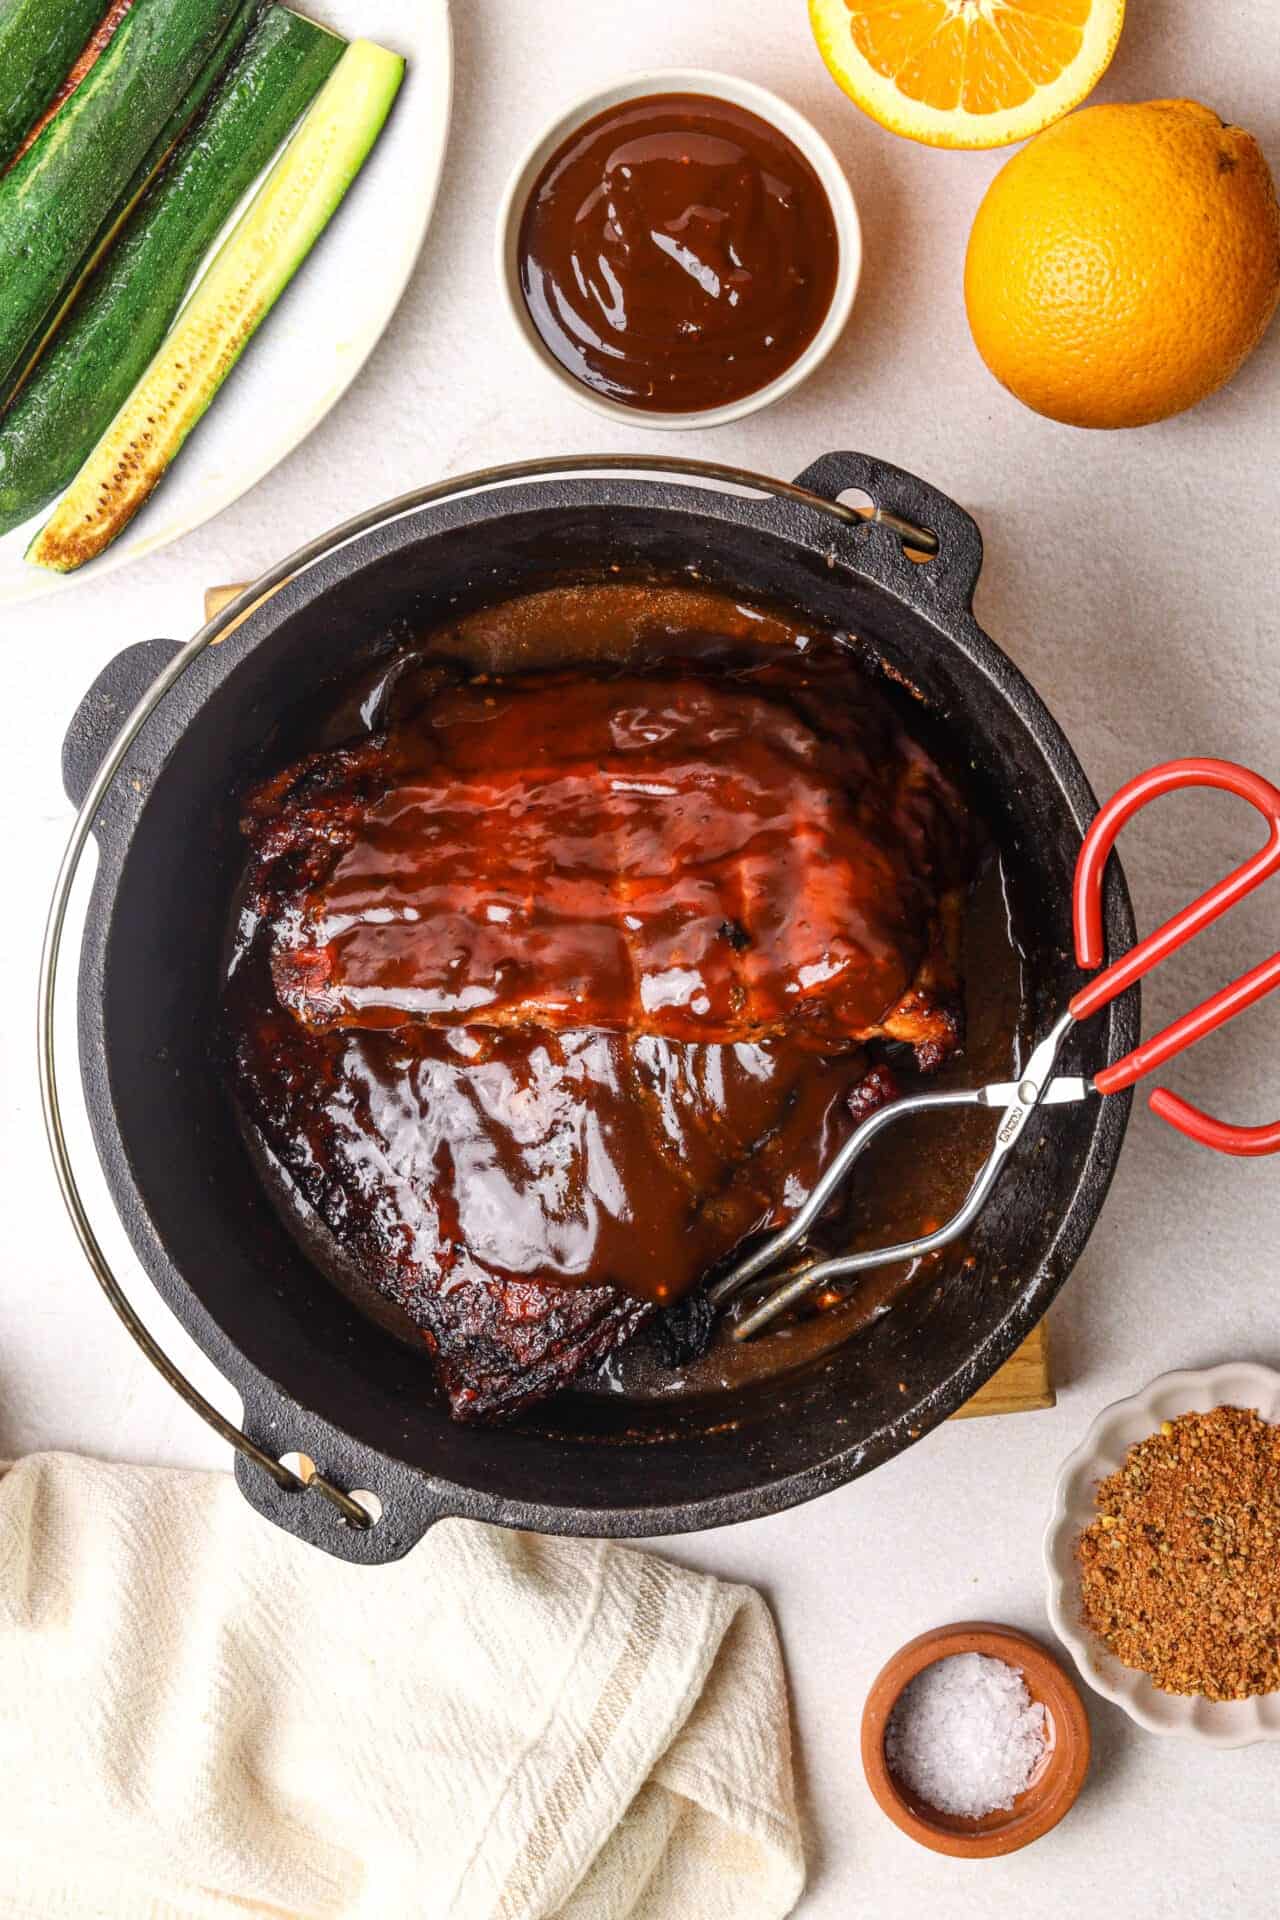
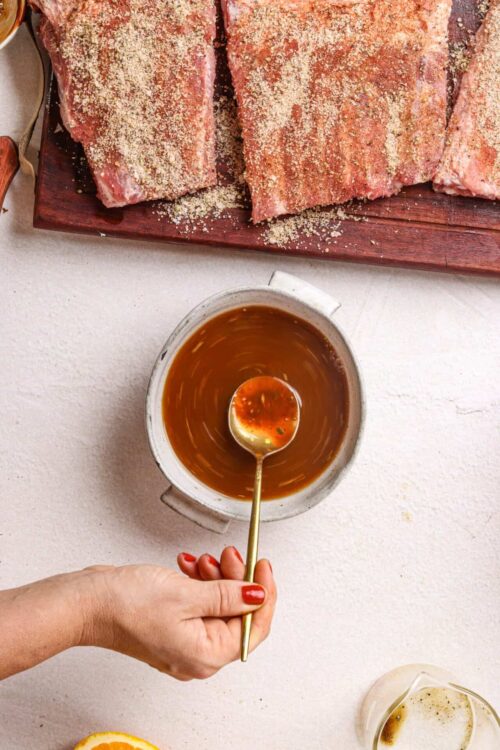
- Add the barbecue sauce and beef stock to the bowl with the remaining spice rub. Stir well to create the cooking sauce.
- Arrange the ribs in the Dutch oven, then pour the sauce mixture over the top. If using, tuck the half orange into the pot. Cover with the lid.
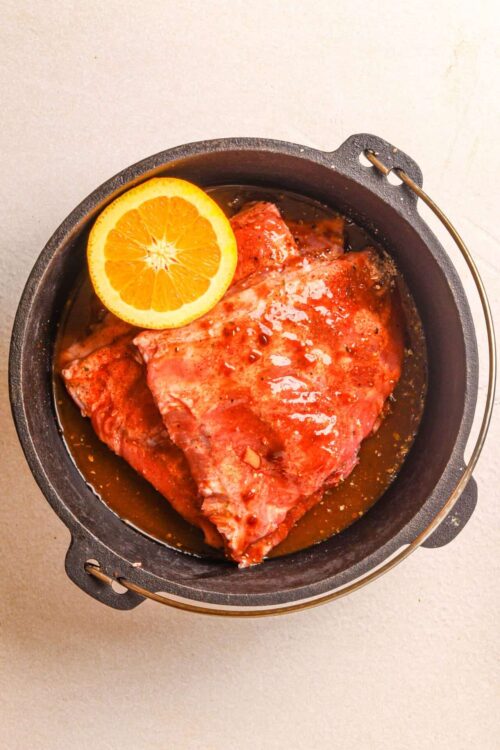
- Bake for 2 1/2 to 3 hours, or until the ribs are tender and the meat is beginning to pull away from the bones. They should reach a minimum internal temperature of 145°F for safety, but the 190°–203°F range is ideal for tenderness.
- Remove the ribs from the oven. Squeeze the orange over the ribs, if desired, then discard the orange.
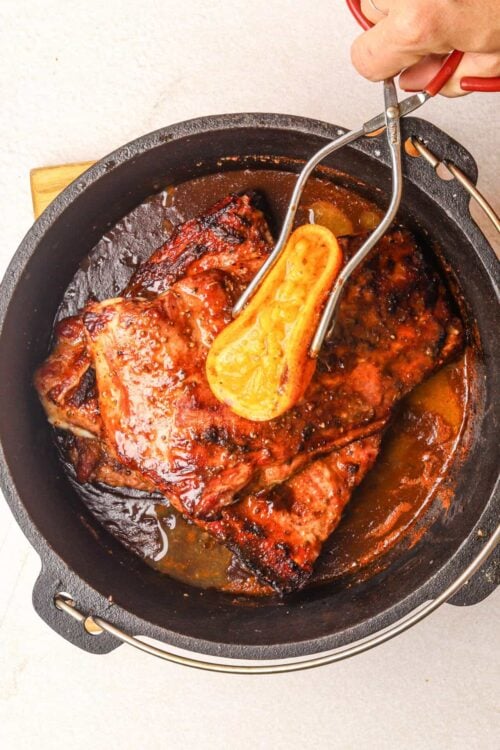
- Let the ribs rest for 10-15 minutes. Brush or spoon some of the sauce from the pot over the ribs, if desired, and serve warm.
Leave a Comment